Thursday, December 22, 2011

How My Hallmark Ornament Collection Got Started

When I was a teenager I had a penpal named Lori from Pennsylvania.  We were penpals for 3-4 years and each year she would send me an ornament for Christmas.  I lost touch with Lori a long time ago but I still have the ornaments that she gave me.  Above is a picture of "Spencer Sparrow" the Hallmark ornament that she sent me in 1979.  Isn't he the most festive sparrow that you've seen?  He doesn't look 32 years old - does he? 

Since 1979 I have added many Hallmark ornaments to my collection.  Below is a photo of some of my Hallmark "ball" ornaments that I display in a bowl at Christmas.  These are just a few of my favorite things......


This will be my last post before Christmas so................Merry Christmas to You. 

"And she shall bring forth a son, and thou shalt call his name JESUS; for he shall save his people from their sins." (Matthew 1:21)

YAY! I won!!!!

My friend Beth at My Heartstring had a contest to celebrate her 1,000th blog posting.  The prize (actually it is prizes since she had 14 winners) was one of her cross-stitch patterns.  The drawing was this morning and........I was one of the winners!!!! WOO HOO!!!!  I won a pdf pattern of my choice - and my choice was "With My Needle" - you can view the stitched pattern here

You can read more about Beth, her patterns and Etsy shop on my 12/14 blog posting.

Wednesday, December 14, 2011

Model Stitching


If you have ever purchased a cross-stitch pattern before, you usually will see a picture of the completed design (also known as a model) on the outside of the pattern. The picture lets you see exactly how the design will look once it has been stitched. That means that the design has to be stitched by someone before the actual pattern is published. Sometimes the pattern designer might stitch the design or he/she may have a "model stitcher" do the stitching.
Two or three years ago I started following a blog written by Beth Twist who designs cross-stitch patterns under the name of Heartstring Samplery. I don't remember now how I became acquainted with her blog...I probably linked to it from someone else's blog. Anyway....long story short....I "answered Beth's call" for someone to do model stitching for her. I stitched a sampler for her last year. If you would like to see that sampler (Poppy Maye Russell sampler), you can view it here. Beth also has an Etsy shop that you might like to visit.
This past spring Beth contacted me again about stitching another model. This particular pattern would be stitched mostly in one color....black. Why black? Because it is a silhouette. I finished the stitching last month and the pattern has now been released. Below is a picture of the completed design that I stitched. If you check out all the cross-stitch patterns on her blog, I'm sure you'll agree with me that Beth does some fabulous crafting!

Saturday, December 10, 2011

Christmas Around The House

Here are a few more pictures - This first one is my "nostalgia" Christmas table. There's an old hankie with Christmasy flowers embroidered on it, an old skeleton key, some red and green buttons in an old bottle, wooden spools with red and green thread, and a tiny card that says "Christmas Greetings". I don't remember where I "found" the tiny card but you can tell that it has some age on it. And....look at the book on the left - it has a collage of old christmas cards and postcards on it. I found it at Home Goods and it's actually a box that looks like a book.


And then I have my mini tree decorated with lots of Hallmark miniature ornaments.......


............and a Santa table - I found the paper santa (standing by the lamp base) at an antique shop in east Tennessee. The back side has advertisement for a now-defunct Savings and Loan. The other santas are different Hallmark ornaments that I've collected over the years. There is a small santa mug that was in an auction box and lastly, the photo in the back - me and santa (circa 1969).


Wednesday, December 7, 2011

Our New Tree!

It was actually snowing quite a bit earlier today. The flakes are no longer falling but the sky still has that snow-promising gray look to it. We had some light flurries early last week. Seeing snow in late November/early December makes me wonder if our winter is going to be filled with it.

A few years ago we gave away our Christmas tree. It seemed like too much trouble to drag out the 6-foot tree and ornaments only to put everything away again in a few short weeks. So, for the last 7 or so years we have not put up a Christmas tree. I did display some of my favorite ornaments and decorations around the house.

This year I got into a "we need a Christmas tree" mood. I finally found the perfect one at Target. It is a 4 1/2 foot tree that doesn't look "too fake". It was also 1) pre-lit and 2) on sale!

The Christmas tree was also going to be a *new thing* for the cats. I wasn't sure what they would do......ignore it or try to climb it. For the most part, they ignore it; although it is sitting in front of one of *their* windows. Here are a few pictures...............


Our old house has tall ceilings so a 4 1/2 foot tree could easily become "lost"; so I sat it on a table to give it the appearance of being a bit taller.


Toby isn't going to let a Christmas tree keep her from looking out the window..................


..........and Tater takes his turn under the tree.


Tuesday, December 6, 2011

Christmas Crafts


Here are 2 pillows that I stitched several years ago.


I cross-stitched this Christmas ornament for a friend. I finished stitching it last week. The pattern was in the 2011 annual ornament issue of Just CrossStitch magazine. In the magazine, the ornament was mounted in a mini tart pan. I could not find a mini tart pan so.....I bought a large bottle cap at Archivers. I mounted the ornament on foam board and glued it to the inside of the bottle cap. Cording was glued around the edge and a red ribbon hanger was added. After I took the picture, I did glue a tiny red button to the bottom center of the bottle cap. I knew that my friend liked squirrels so when I saw this pattern, I knew that I *had* to stitch it for her.


This is the second cross-stitch ornament that I have stitched recently. The ones that I stitched were very quick and easy to finish. I would like to continue stitching ornaments throughout 2012 and (hopefully) have a few to put on my tree next year. Wouldn't a tree decorated *only* in handmade items be adorable?


Thursday, December 1, 2011

A Giveaway

Barbara at To Stitch or Not to Stitch is having a giveaway. Check out her blog to see the cute pattern and supplies that she is giving away. While you're there, take a look at some of her stitching projects..............very nice!

Friday, November 25, 2011

Look What I Got In The Mail Today


Earlier this week I posted a picture of a cross-stitch ornament that I had made for an ornament swap. My ornament swap partner is Sarah and she lives in Oregon. I mailed my ornament to her earlier this week. Today I received the ornament that she made for me. Isn't it just adorable? The wreath is made from felted wool. There is a tiny gold star charm at the base of the purple ribbon hanger. Makes me want to try my hand at felting wool (oh no! another hobby!).


The ornament exchange was put together by the people at Pink By Design Stamps.

Tuesday, November 22, 2011

Handmade Christmas Ornament and Random Cuteness

I just finished stitching this Christmas ornament. I was very unsure about my ornament "finishing" abilities; however, once I got thru putting the ornamental binding around the edges and giving it a ribbon hanger, I thought the end product looked pretty good. The pattern is in the Just Cross-Stitch 2011 Annual Christmas Ornaments issue; the designer is Jeanette Douglas Designs. It is called "2011 Noel Stamp Ornament".


I am participating in a handmade Christmas ornament swap and this was my contribution. The only rules of the swap is that the ornament had to be handmade (paper, fabric, beads or any other medium). The recipient of the ornament lives in Oregon. I mailed it yesterday so she should have a surprise in her mailbox by the end of the week. I hope she likes it.


I've started stitching another ornament for a friend.....I owe her a handmade item. I'll post that pic soon.


And......to end this post in a randomly cute way, just take a look at this picture of Tater......awwwwwwwwwww, how cute!


Saturday, November 19, 2011

Bragging on Cheryl


I *LOVE* getting snail mail (good snail mail....not advertisements, bills, etc.)


Look at this cute Thanksgiving card that I got (via snail mail) today from my crafty friend, Cheryl. And while we are on the subject of Cheryl, you need to check out her blog - she has made the *cutest* Christmas planner.


Both Cheryl and I LOVE to make cards. Her card style is so different from my card style......probably a good thing.....that way we won't fuss and bicker and say "you stole that design from me!" (not that we would do that anyway). :o)


Cheryl has also started making the cutest paper hair bows - she has pics of these on her blog also.


So, visit Cheryl's blog (don't make me tell you again!) and then go get your craft on!


Thursday, November 17, 2011

My New Hat!

This blog post doesn't have *anything* to do with paper, fabric or books (except that THE HAT is made from wool.....which is a fabric) but anyway.............

My friend, Judy, and I went to Green Hills Mall yesterday to check out a couple of the new stores - Nordstrom and The Container Store.

I didn't walk in Nordstrom looking for a hat. But when I saw this one.......it had my name on it.


Isn't this the cutest little hat?????????? It looks like it has some blue in it but it is actually black 'n gray. I *love* my new hat ;o)

Ooh La La............Paris

Just a quick post to show you the "welcome home" card that I made for a friend who recently spent 3 weeks in Germany and France. The card has a Paris theme...........one of her favorite cities. With the exception of the Paris paper on the right side of the card, all the embellishments were from papers/stickers/buttons that I've had for awhile so I won't even try to mention the manufacturer. The Paris paper is from Graphic45 Curtain Call Collection (Tour de France) and the brown/white twine is Stampin' Up. There is a glare on the top right sticker - it says "memories". I spent the day with my friend yesterday and hand-delivered the card to her....she *adored* it!


I have two specific cards on my "must make today" list so I'm off to get my card-crafting on!


Tuesday, November 8, 2011

I've neglected my blogging.....too busy doing other activities - guess it's "that time of year"! Anyway, I mentioned in a previous post about the grand opening of the Archiver's store in the Nashville area. I did get in on the Grand Opening day and thought I would post my purchases.

The pic below shows some emerald gemstones which I bought to embellish Christmas cards, a package of tiny antique keys....they are soooooo cute and I have several friends who are crazy over antique keys - (can't wait to use these as card embellishments) and a 6x6 pad of Christmas paper "25 Days of Christmas" by Simple Stories (36 sheets of patterned paper).


And then I found a 12x12 sheet with a Paris theme to use on a card for a friend who just returned home from there. This is double-sided paper (the back is a cream/taupe stripe) by Graphic45. The 12x12 sheet on the right has a baby theme. It is also double-sided. This paper is made by October Afternoon. A friend of mine just had a baby boy and I have another friend having a baby girl in January so I'll be using this on their baby cards. The 12x12 sheet at the bottom (double-sided) is for my "November/Thanksgiving" cards which I hope to get crafted this afternoon. This sheet is by TPC Studio.


And then I HAD to buy some 12x12 Christmas sheets (all double-sided). The one with the green alphabet is actually a 12x12 sheet of stickers and is not double-sided. This is by BoBunny and has some really cute Christmas stickers on it. The black sheet has Christmas sentiments on it (Peace, Joy, Holiday Wishes, etc) and the cream color sheet below it has vintage-looking Christmas sheet music - both of these are by Graphic45 (they have some GREAT paper!). The red sheet on bottom left has santa heads embossed on it and is made by Bazzill Basics. The top left sheet is by TPC Studio and is called "Timeless Christmas Cards" - the little squares are pics of vintage Christmas cards.


I also made a trip *BACK* to Archiver's yesterday with my card-making buddy, Cheryl. It was her first trip to Archiver's and she LOVES it!!! Yesterday I purchased the gold Krylon paint pen that I used on a make-and-take (see November 4 posting).


After finishing this blog, I'm headed to my craft room to "craft away the afternoon". I hope to have lots of pics to post soon. Happy crafting to you!


Friday, November 4, 2011

Oh My!!

Today was the grand opening of the Archiver's store in Franklin. I usually don't get in "grand opening" mobs; however, we are talking cardstock, decorative papers, ink pads, rubber stamps....need I say more? I'll have to post some pics of the *cute* cardmaking supplies that I bought. In the meanwhile, I do have a picture of the free make-and-take card that I made at the store.


Red cardstock was used for the actual card. A gold paint-pen (made by Krylon....the spray paint people) was used to draw a border around a smaller piece of green cardstock....doesn't it look like the card has a piece of green cardstock adhered to a piece of gold cardstock? The Christmas trumpet and "Joy to the World" was stamped on the white die-cut piece using black ink. The ribbon on the trumpet was colored red using red marker; the red marker was also used to color the holly berries. A green marker was used to color the holly leaves. Gold glitter paint (in a squeeze bottle) was used to color in the trumpet. The gold paint pen (I think I may have to get me one of those) was used to make the gold border, which is hard to see in the picture, on the white die-cut.

The green cardstock was adhered to the red cardstock using tape adhesive. The stamped piece was adhered to the green cardstock using foam adhesives for dimension.


If you are not familiar with Archiver's, you need to stop by the store to see all the goodies they have. They also offer classes and have a "Free Crop Night" on Friday nights where you work on your projects using their equipment (die cutters and dies, heat embossers, etc).


Sunday, October 30, 2011

Sunday Afternoon


I will be finishing up a major cross-stitch project either tomorrow or Tuesday. After that I will be focusing on Thanksgiving cards and a couple of cross-stitch Christmas ornaments. Do you love autumn as much as I do? We will be having our first-of-the-season wood-burning fire this evening.


Here are a couple of photos that I took today in the absolutely wonderful fall weather.


Tuesday, October 25, 2011

Paper and........

For those of you fortunate enough to live near Hobby Lobby (the closest one to me is 30 minutes away), you probably already know that they have *ALL* scrapbook paper 50% off this week - woo hoo!!!!!!!!!!!!!!!!!!!

Since I don't have enough paper (that would be sarcasm with a capital "S"), I stopped by the Lobby yesterday to see what I could find. Since this blog is about paper, I thought you might like to see what I got. I tore a couple of sheets out of each bundle so you could see how *CUTE* they are:


This one is "Lost & Found - Union Square" by My Mind's Eye. It is a 6 x 6 inch designer paper pad with 24 sheets of *double-sided* cardstock paper! The sheet on the right is a piece of music and the one on the left reminds me of a vintage wallpaper pattern. The pad has 2 pieces of 12 different designs.


The paper pad shown below has 8 pieces of 6 different designs = 48 sheets!!!! AND.....the sheets are double-sided. The paper size is 6"x6". It is the Conservatory pack by 7gypies. I really go for the vintage look and these papers do not disappoint. The 2 shown below look like pages from old textbooks showing different species of birds and butterflies. I can't wait to use these!


The following 2 pictures show 8 x 8 inch paper pads from October Afternoon. These are not double-sided but they are so cute.....who cares if they are double-sided or not! Both pads contain 34 cardstock papers (17 different designs). The first picture below is "5 & Dime". The paper on the right has the cutest design on it (kinda hard to see in the pic.....take my word for it- it is really cute). The paper on the left has 5 & Dime prices printed on it.


The other pack of October Afternoon paper that I bought was Modern Homemaker. The paper on the right is a red/cream plaid that kinda reminds me of the old oilcloth table covers. The picture on the left is a page from an old magazine with vintage advertising and 3 "prize-winning recipes". The pack also has paper that has vintage kitchen appliances/utensils printed on it.


I hope to make some cards soon using these new papers.....I will post pics. You may want to visit the websites (and then link to their blogs) for the companies listed above. Their websites and blogs have lots of great ideas along with other product lines. Happy crafting!!!!


Monday, October 17, 2011

Fall Holiday Cards

Halloween is right around the corner. Here is a cute Halloween card that I made last year.


This is such a simple card to make. I used supplies that I had in my "stash".....pumpkin sticker, orange/white ribbon for bow, orange/white gingham paper for bottom greeting, 2 orange buttons and a clear "trick or treat" sticker. You could also stamp a Halloween greeting on the gingham paper.


And here is one that I made for Thanksgiving last year:


The base is orange cardstock. I cut a strip of thanksgiving paper using pinking shears and adhered it to the cardstock. I cut out part of a Thanksgiving song (using the pinking shears) and adherred it diagonally on top of the cardstock/thankgiving paper. A clear "give thanks" sticker was placed on top of the song and I topped it off with a cute little bow made from orange metallic ribbon.


I'm a piano player and I LOVE incorporating pieces of music on my cards. I have several old hymnals and songbooks that I use to find "the perfect song" to add to a card. You can find hymnals and music books quite cheap at used book sales and thrift stores.

Saturday, October 15, 2011

A Christmas Card That *Anyone* Can Make!!


This card is for those of you who say: "I'm not crafty/talented enough to make cards." or "I just don't have time to make cards" or any other excuse you can come up with.

It doesn't get much easier than this! Here's a list of supplies to gather:

Holiday-colored blank cards
A few sheets of holiday paper (Hobby Lobby or JoAnn's has a great selection)
A sheet or two of brown paper
A "star" rubber stamp or stickers
Green or Red Rickrack (use the tiny/baby size)

Cut a strip of brown paper for your Christmas tree trunk and adhere to blank card.
Cut strips of holiday paper (different lengths as shown in the sample card) and adhere to card starting with the longest length at the bottom.
Rubber stamp the star or adhere a star sticker to top of tree
Cut different lengths of rickrack and glue (Alene's craft glue is my fave) diagonally to your tree.
YOU'VE JUST CRAFTED A HANDMADE CHRISTMAS CARD!!!!
If you have Christmas "sentiment" rubber stamps or stickers, you can decorate the inside with a "Merry Christmas" or "Happy Holidays", etc.

This really makes a cute and simple card. I used paper with red, green and white polka dots so it looks like the tree has ornaments. You could also adhere little "gemstone" to your tree for ornaments if you wish. Depending on the design of your holiday paper, you may not wish to add any embellishment other than the rickrack to keep the design looking simple.

So now you have no excuses..............................start crafting!

Thursday, October 13, 2011

A Few More Completed Projects


I made this cute Halloween card a few days ago. The inspiration for the card came from a posting in the Sept 2011 issue of Card Maker magazine.


I stamped a pumpkin on orange card stock, colored the stem light green and added some grass around the base of the pumpkin in light green. I didn't have alphabet stickers - either the size was wrong (too small) or the color was wrong (hot pink??????????? I can't use hot pink for Halloween) - so........I got out my Fiskars Shape Cutter and Fiskars Alphabet Template to cut a "B" and "O" using cute black, white and orange stripe paper.


Then I tore the edge of the orange cardstock (for some reason, I resisted tearing paper for the longest time...........Now, I LOVE the look of torn paper), smudged the edge with black ink, adhered the "B" and "O" in the appropriate places using self-adhesive foam mounting tape (this adds some dimension to the letters), adhered the orange panel to black cardstock with permanent tape runner and attached the black panel to a card front.........finished before you could say "Boo!" The pumpkin stamp is an older Stampin' Up stamp.


On a different note, here are cross-stitch projects that've I've recently finished:


This is Kitty Cottage Sampler by Little House Needleworks which I actually finished stitching in January 2010 but only recently had framed.....I don't like to rush into things :o)


And another sampler that I stitched earlier this year for my nephew's June wedding:

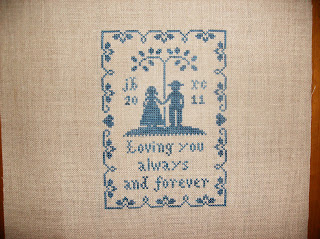
Always and Forever - also by Little House Needleworks

Little House Needleworks is one of my favorite cross-stitch designers.

Oh, I also want to promote my friend Cheryl's card-making blog - she makes *awesome* cards - take a look!

Wednesday, October 12, 2011

Stationery card

Judy & I have "board meeting" every month.......usually held at Starbucks. This is a pic of us taken before our September board meeting. I took advantage of Shutterfly's free photo card offer (which expires tonight) and had this cute card made.


Falling For Fall Fall Greeting

Modern greeting cards and party invitations by Shutterfly.

View the entire collection of cards.

Hello Out There............

Wanted:

Followers for my new Blog.
Serious inquiries only.
Apply by clicking on "join this site".

Tuesday, October 11, 2011

Welcome to My World

Okay, I am going to do this. I am actually going to BLOG!!!!!!!!!!!!! Am I going to be consistent in my blogging? Let's just say that every January I start journaling and.......

I was actually pretty good at it this year. I think the last entry I journaled was July - Nope, sorry, I just looked, it was June 13. That's not too bad and maybe I'll start again tomorrow with an entry that says "finally blogged".


Anyway, this blog will mainly be about card making projects that I am doing or cross-stitch that I am working on with a random book review thrown in every once in awhile. That should explain my blog name "Paper and Fabric and Books...Oh My!"

I am somewhat unorganized in my craft supplies. While looking for supplies to "embellish" a card, I found this


How cute! An ornament cut-out! (BTW, it is propped up on my *new* Thirty-One Expand-A-Tote) I started looking for scrap strips of Christmasy-colored paper which I used to cover the back. Adhesive was applied on the back of the white cardstock, the colored strips were placed face-down (diagonally) to the back of the white cardstock. Once that was done, I added a little ribbon "hanger" to the front of the card and embellished with a diamond gemstone. I used some maroon ink to lightly smudge around the white cardstock and attached the white cardstock to green cardstock. This was then attached to a 4x6 white card. I stamped the word "celebrate" at the bottom using green ink. Here is the finished product...........


I actually purchased a package of these ornament cut-outs at a CKC show at Opryland two years ago. A package of 4 was $1.25. The package had *no* information on it.....like who I bought them from, a website for reordering, etc. BUT.....I've had this business card hanging on my bulletin board for awhile and once I came across the ornament cut-outs, I just *knew* that the business card *had* to be for the vendor who sold these cute cut-outs. Sure enough, I looked at the website listed on the business card and found more of these cute cut-outs. For some reason, they are called "frames" on the website. The website is http://www.designsbydreamer.com/ - some of the info is very out-of-date (such as the page for her "schedule") but it appears that you can still order supplies from the business. And I'm sure that there is a template somewhere that will do this design....but since I don't have a die cutter, I may have to order a few more packages of these.


Oh, to finish off my card, I did stamp "Merry Christmas" inside using green ink. Hope this inspires you to make a handmade Christmas card.